
Would you REALLY keep up on the ironing if you had one of those uber-convenient, built-in ironing boards? For me, the answer is a resounding YES, and I spent about $40 to make that dream come true.
All the wrinkles in my dirty laundry
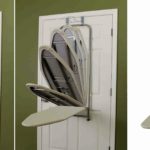
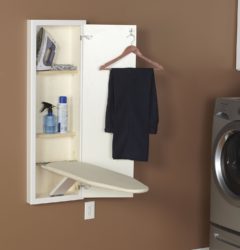
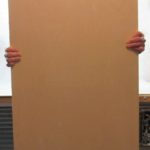
Our previous home had a spacious upstairs hallway with a large linen closet, where we installed an over-the-door ironing board. It looked something like the one above, but was fastened to the inside of the closet door so it could be shut away when not in use.
It was convenient, but it wasn’t all that stable, even after we screwed it into the door. And there wasn’t enough padding on it to keep the metal mesh pattern of the ironing board from showing up on our clothes.
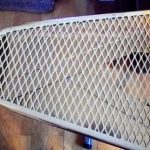
Not a good look embossed into a silk blouse or dress shirt, am I right? Of course, I could have added more padding than what came with the ironing board cover, but then the cover wouldn’t have fit.
When we moved to our condo, I had no ironing board because we left the other one behind. And though our condo is spacious enough, it’s still just 1,400 square feet. There was nowhere to install an over-the-door board where it would function properly, no room in the closets to store a full-size board, and certainly no place to set a board up and leave it.

So for a while (okay, more like four years) I sent washable clothes to a dry cleaners so THEY could iron them. They made it too easy for me with a twice-weekly pickup and delivery service (that’s right, blame it on them), and in the summer my monthly bill hovered around $100. A ridiculous waste of money, I know.
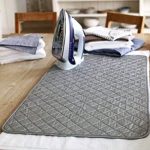
During this time, if I sewed and needed to iron fabric, I spread out towels on the dining room table. Eventually I bought a Teflon-coated ironing mat and used that on the kitchen peninsula, which worked a bit better.
Because of my weight-loss journey, the few clothes I had didn’t require ironing and so ended my love affair with the dry cleaner. But now that my weight is relatively stable and my wardrobe replenished, I have more items that require ironing, and the mat doesn’t cut it.
So I turned to husband Chris for a solution…
And WOW, did he ever come through!
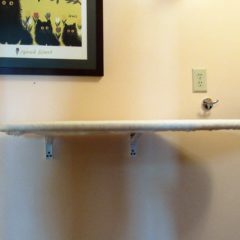
Now I have a BE-YOU-TIFUL wall-mounted, fold-away ironing board right in my laundry room that doubles as a table for folding laundry. It cost about what you’d pay for a clunky free-standing board, but there’s no metal mesh to mar our clothes!
Follow along to see how we did it…
First, we got inspired!
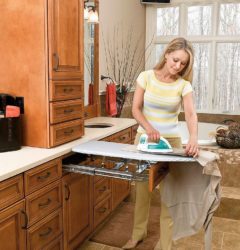
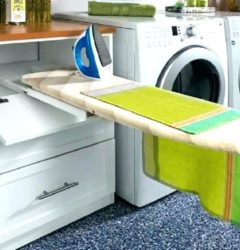
The internet is chock full of great ideas for built-ins that make life tidier and more convenient. If you have the room and the dough (upwards of $150), you can even buy ironing center cabinets to install in your home or hardware to retrofit a drawer with a collapsible ironing board. We had neither, so we started with what we did have.
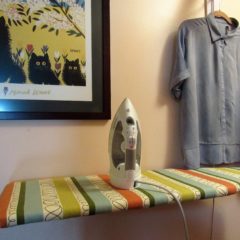
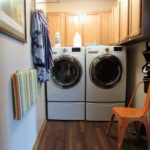
You can see in this photo an electrical outlet about 4 feet off the ground on one wall of our laundry room just crying out for an iron. We started there by taking measurements of the wall and marking out stud locations for mounting.
Chris also found this helpful video on-line. We don’t have a HUGE laundry room like Martha Stewart, nor do we need or want a board the size of the one she makes here, but we welcomed her advice on materials.
She recommended and we used:
- 3/4-inch plywood for stability and durability. You want to use plywood because the multiple pressed layers add strength and prevent warping from the moisture and heat that go hand-in-hand with ironing.
- All natural fabrics in the padding and covering. Martha’s board uses wool padding and cotton covering. We priced wool bunting but used all cotton to save money (more on that later). Both wool and cotton are resistant to heat and therefore make the best padding and covering. Think about it: You use a lower heat setting to iron synthetics, so why would you have a polyester ironing board cover or cheap foam rubber for padding?
Make your list & check it twice
An average standard ironing board is 54 inches long by 15 inches wide, whereas an over-the-door one is typically 42 by 14. I was used to the smaller size, so that’s what we decided on for this project. You can actually make your board any size and shape your heart desires and your space allows, just adjust the materials list accordingly.
We bought supplies at both the hardware store and the fabric store. For a board sized like ours you’ll need these materials:
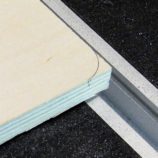
- 1 Handi-Panel (2 by 4 feet) of 3/4-inch thick plywood
- 2 folding shelf brackets, 12 inches each
- 2.5-inch screws to attach hinges to wall
- Twin-size quilt batting, 100-percent cotton
- About 1.25 yards of 54-inch wide muslin or other 100-percent cotton fabric
We also used these tools:
- Electric jigsaw
- Electric AND manual staple guns with 3/8-inch staples
- Electric drill
- Screwdriver
- Quik-clamp (optional)
- Straight edge (we used a straight-edge clamp)
- Scissors for cutting fabric
- Pencil
We paid a little bit more and bought plywood with a birch veneer so the board’s underside, which would be exposed, would look more finished. A regular sheet of plywood is 4 feet by 8 feet–much more than we needed–so we were glad to find the Handi-Panel at 2 feet by 4 feet at one-third the cost.

We needed hinges that locked up, then released easily so the board could fold down. We found some online for more money, but these Storage Shop Folding Shelf Brackets from our home store did the job AND we didn’t have to wait for delivery.
While at the hardware store, we also looked at ironing boards in the size we wanted and took measurements to help us cut the tapered end accurately.

At the fabric store, we looked at wool felt bunting like Martha used, as well as cotton bunting. Both these products are generally used to provide additional insulation value to draperies and tended to be a bit pricey. So we compared them to cotton BATTING, used to provide thickness and warmth to quilts and blankets and opted to go that path.
We also hit a 50-percent-off sale, which saved us even more money. We estimated we’d need four layers of padding, so we bought a 100-percent cotton batt in a size pre-cut for a twin quilt.
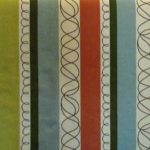
We already had the screws needed for mounting the board and the cotton fabric for covering it, which saved us more dough. This drapery-weight Kaufman print, with its bright colors and fun midcentury modern pattern, was left over from another project of mine and blended perfectly with my decor. I prewashed it to make sure it would not fade on my clothes later when I ironed over it.
Cutting up (literally, NOT figuratively)
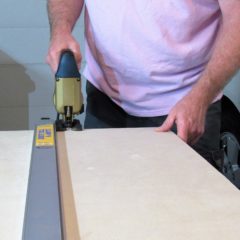
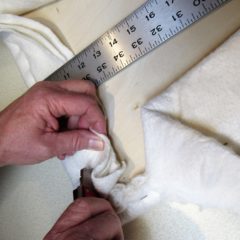
To make the project easier to to handle, Chris used the jigsaw to cut the plywood down to the finished board’s overall dimensions–first removing excess width (left), then excess length (right), leaving us with a rectangular piece of plywood 42 by 14 inches. This is where the straight-edge clamp left over from Chris’ furniture-building days came in handy.
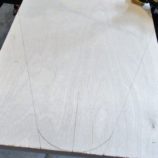
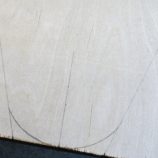
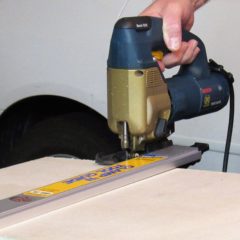
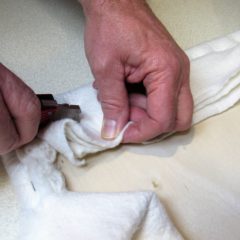
Then he laid out the taper (left, closeup center) and rounded corners on the opposite wide end (right) in pencil before trimming with the jigsaw.
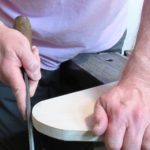
Finally, he used a file to smooth out the rounded edges and knock the worst of the splinters off.
Wrapping up (ALSO literally, not figuratively)
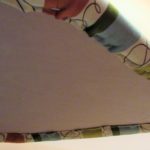
We used our kitchen peninsula to cover the the board, first with the padding, then with the printed cotton. I simply left the batting folded so there were four layers, cut off the excess while still leaving enough to fold and fit, and pressed out any creases that might transfer when I ironed clothes.
The corners on the wide end of the board (left) were the toughest to fit, and it helped having two pair of hands–one to hold and one to staple. The tapered end (right) required careful maneuvering as well.
While these areas will be covered with the cotton print, you want to get neat folds that reduce bulk wherever possible. Martha’s video has some good tips for this, but mostly we found we just needed to play with it.
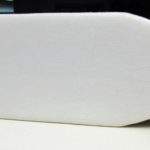
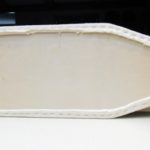
When we finished stapling the padding, we cut off any excess, leaving about an inch beyond the staples. Here’s how it looked front (above) and back (below).
Next we added the printed cotton covering that would be the finished ironing surface. Stripes in the fabric pattern helped us line the fabric up. Before stapling, I cut the remnant into the approximate shape needed, with plenty of room for fitting and, this time, turning the raw edge under before stapling in place.
We did this on a different day, and I forgot to take photos until we had the board installed, but the procedure is the same as for the padding layers, except you need to cover the padding edges and turn the cover’s raw edge under. You can also use fabric glue to cover the raw edge and/or the staples with a cotton twill tape, which is Martha’s suggestion.
Finishing up (literally AND figuratively)
Earlier I mentioned locating the studs on the wall where you plan to mount the board because the hinges MUST be installed into studs to support not just the weight of the board but also the pressure of ironing on it.
But at what height should the board be? Many full-size ironing boards are adjustable in height but still too low for most of us even when positioned at their top height of about 38 inches. Your height factors in, as well as whether you prefer to sit when you iron.
Always the researcher, Chris found that the optimum height for an ironing board (or a kitchen island!) is 41 inches–about elbow height. That seemed high to me, but the science says there is actually less strain on your back, shoulders and arms at this higher height.
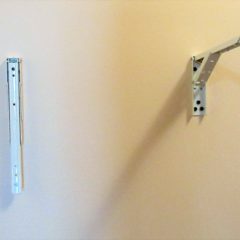
So that’s where we installed ours, marking out and drilling pilot holes for the 2.5-inch screws. Each hinge got two screws in the wall (left). We also used this opportunity (before putting the printed cover on our board) to mark where to make pilot holes for the shorter screws (included with the hinges) that would attach the hinges to the board (right). Again, each hinge got two screws.
A few things to remember when positioning hinges on the board itself:
- Install far enough in at the back of the board to allow wiggle room for your garments as you iron. We allowed about an inch, but should have done 2 inches. We’ll probably take it off and redo it when we get a chance.
- Install one near the wide end and the other in the next stud but preferably as far away from the taper as possible, also to allow for better maneuvering of garments as you iron.
- Make sure you can reach the releases at the front with your thumbs while your fingers are on top to put the board in the fold-down position.
- Choose which side you want the taper on. I’m left-handed, so I prefer the tapered end on the right. Chris is right-handed but said he can iron either way, so we installed it for my convenience. I wish the electrical outlet was on the left so I didn’t have to fight the cord, but I can live it.
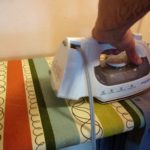
The overall setup is so much more convenient that I don’t mind that cord.
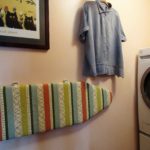
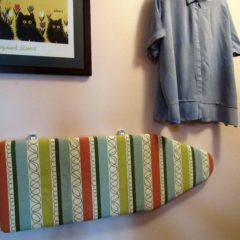
And it looks so beautiful up or down, doesn’t it?
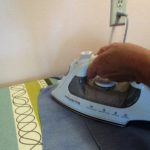
But I DO still need a place to store my iron. Perched on top of the washer isn’t a good permanent solution. I had been storing it under the sink in the adjacent half-bath, but why not make that more convenient while we’re at it?
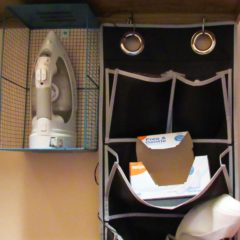
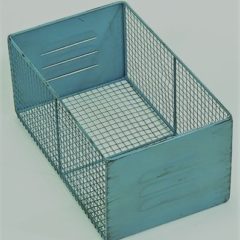
There was just enough space to mount a holder for the iron next to my laundry aids organizer (left). The industrial-style bin in turquoise (right) fit perfectly with my orange industrial-style laundry chair AND the orange, turquoise and lime print on the ironing board. We found it HERE for just $10.
Now I pretty much love ironing so much, I could do it all day.
Well, that’s a bit of an exaggeration, as much as I do love the higher height. But if there’s ironing to do, I get it done pronto, and I don’t mind it as long as it’s MY stuff.
Chris, however, is still on his own. Because once you get a partner trained it’s silly to backslide and let them get spoiled again, right?
If you want more…
All I can say is, PRESS ON! ;-> ;->
