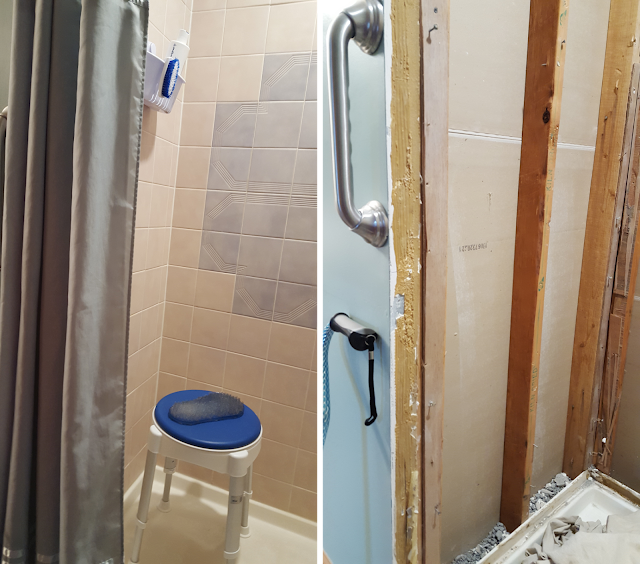
Yesterday marked the end of the Lawson condo puke-pink and blue heart-flower tile master bath. I experienced great joy watching that tile crack, break, crumble and fall to its death. Sounds like a rock song, doesn’t it?
So much so that Ian Smith of Smith & Sons did a little demo dance while I snapped photos. That’s his dad, Lewis, in the foreground.
By lunchtime only one small piece of blue tile remained “standing,” Good riddance, I say.
Finding our niche or not
All went well with demolition EXCEPT the dead wall space we all THOUGHT was between the shower and the coat closet WASN’T there. That meant no tiled, recessed shower bench as planned.
A few knocks back and forth with Lewis on one side and Ian on the other confirmed the wallboard you see in the right-hand photo is, indeed, the closet wall. Lewis and Ian both made suggestions. In the end, while they finished taking down the rest of the tile, Chris and I discussed those alternatives, and he did some research on what seemed the most plausible choice. More on that later.
Up for grabs
A big factor in our reno is to have blocking built into the wall so heavy-duty grab bars can be permanently installed. Currently I use grab bars that adhere to the shower wall with suction cups. You can just glimpse the one mounted on the left; the other is to the right of the faucet.
These assist bars are better than nothing at all, but they’re far from foolproof. Over time they loosen up and have to be reapplied. I’ve learned to test them before I get into the shower. And I try to rely on them only to steady myself and avoid slipping because I can’t guarantee they’ll hold if my weight and the force of a fall hit them.
The above-left photo is an example of blocking done for grab-bar installation. Horizontal pieces of wood are installed between the studs, all the way around the shower, and their location recorded. Waterproof backerboard is installed over this, and then the wall is finished. Mounting holes for the grab bar are predrilled with a special bit that won’t crack the tile, then the bar is screwed in place. If done correctly, the bar shouldn’t budge. Ever.
We chose this Moen bar on the right in brushed nickel because it matches others already installed in other areas of our bathroom.
Shower power
Our reno doesn’t involve any change to the plumbing within the walls. However, we are making some external adjustments to fixtures for ease of use.
- We purchased a showerhead that would provide a more forceful water stream.
- Between the showerhead mount and the showerhead, we may add an adjustable shower arm to extend the reach of the water stream even more.
- Then we’ll add a high-pressure, ergonomically designed wand on the long wall.
- In between the wand and its hose, we’ll add a pressure-reducing on/off control valve, so water can also be shut off from the wand.
- The contractor will build in blocking to mount the wand permanently. But instead of using the plastic mount that came with the wand, we’ll substitute this solid brass mount, finished in brushed stainless steel to match blend with the rest of the fixtures.
Day 1 is done and that heart-flower is finally history!
Trash removed, drop cloths rolled up, hammers silent (thank you, Jesus!). Tomorrow the boys are back to start on the blocking and backerboard. I’ll update you again on Thursday, and let you know then how Chris and I restructured our design plans for life without the shower bench of our dreams.
*sigh*


