


My blooming Christmas cactus is a reminder that it’s been too long since I’ve posted, AND I owe you some summer leftovers in the way of Lawson household DIYs. And yes, the Christmas cactus is blooming early, probably in an effort to get me in gear before the holiday season sets in full tilt.
Remember back to my summer master bedroom refresh? Honestly, I’m ashamed to call to your attention that it was mid-July before I got that one in the can. More embarrassed still to point out I promised you a couple of how-tos on specific projects I did for that refresh, which I’ve not yet delivered on.
But just to prove I AM a woman of my word (even if I lose track of time!), here goes my first installment of catch-up…
When to buy vs. when to DIY, as well as how
I bought my daughter a hammock chair at the beginning of summer and I thought I could save money by making the cushions. The ones sold for the chair were euro-size–26 inches square–and I already had two euro inserts I wasn’t using.
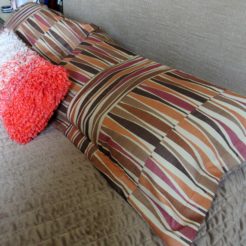
Erin chose a maroon all-weather, fade-resistant fabric, which I managed to get on sale at 40 percent off. I saved some by making them (only because of the sale!), but mostly I got a bigger choice of higher-quality fabric.
Why an envelope pillow instead of a zippered one? Well, quicker and cheaper to make is the down and dirty answer. Zippered pillows when made out of the same fabric front and back have the advantage of being reversible, but I usually change out my pillows before I wear out the one front cover, soooo time and again, it’s envelope style for me.
So here’s the step-by-step…
Step 1 – Figure the yardage you’ll need
Each envelope pillow cover requires one piece for the pillow front and two smaller pieces for the pillow back that will overlap and allow you to insert the pillow form so it won’t show.
A simple formula for a basic envelope cover calls for one piece the size of the pillow insert plus two pieces the size of the pillow insert length but HALF the width PLUS five inches.
If you want a flanged edge, which is what I usually prefer, add the depth of the desired flange onto these measurements BEFORE cutting. You don’t need to add in seam allowances because you want the insert to fill up the finished cover well.

For these outdoor pillows, I wanted a one-inch flange when finished, so I added two inches to the length and width of each piece (one inch on each of two sides).
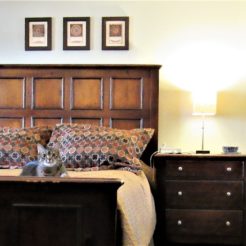
I made my master bedroom pillows (left) and my guest room pillows (right) with a bit deeper flange. Just determine what you like for the way the pillow will be used and adjust size accordingly.
For my two-pillow project, I needed two pieces 28 by 28 inches and FOUR pieces 28 by 19 inches (14 + 5), so I bought two yards. My fabric was solid with a directional grain. If working with a pattern you want displayed in a particular way, you may need extra fabric.
Step 2 – Prepare your fabric and cut

You’ve heard the adage, Measure once and cut twice OR measure twice and cut ONCE, right? Same goes with sewing. A little bit of extra prep work prevents problems.
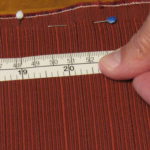
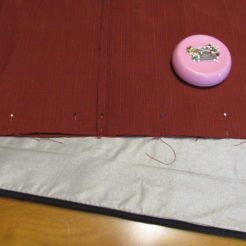
Fabric is never cut off the bolt completely straight, so the first thing I always do is even up one cut end by either unraveling until I can pull a thread all the way across, OR pulling out one thread that goes all the way across then cutting along that line.

Aligning the fabric at the top then allows you to align it at the selvage edges and on grain, which impacts how your finished item looks. The fabric I used was 56 inches wide, which meant if I lined everything up just right I could get two 28-inch pieces out of each fabric width.
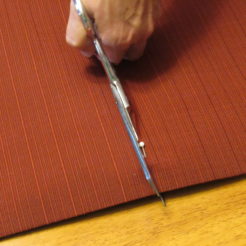
And I could do it with fewer cuts by folding the fabric in half lengthwise, pinning edges and pressing the crease as a cutting guide. So one cut through two thicknesses to get the length and another cut through one thickness–right along that fold–to get the width exact for each pillow.
I then cut my smaller pieces, two up through two thicknesses.
Step 3 – Hem your back overlapping pieces
Whenever I can, I try to cut the edges that will overlap on the selvage to simplify the hemming process. That way I only have to turn the edge down once and stitch, rather than running a quarter-inch edge which I then turn under again to get a finished edge that won’t unravel.
Either way, allow about 1.25 inch for this hem and machine-stitch in place close to the edge. I switch to a zipper presser foot on my machine to make this step easier.
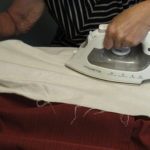
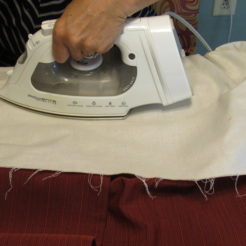
For exterior-finish pieces, I ALWAYS mark, fold and press with an iron BEFORE I stitch. It’s a practice I learned in tailoring classes that takes a bit of time up front but makes sewing easier and more precise; hence the finished item is tidier.
Step 4 – Assemble Your Pieces and Stitch
Assemble one set–front and two backs–with right sides together. That means the finished edges of the flaps will be face down, against the fronts. Overlap one back flap over the other and pin into place with pins perpendicular to the edge so the machine will sew over them easily.
A standard seam allowance is 5/8-inch for garments and 3/4-inch for home decor. But a half-inch generally works well enough. Slow the machine down when you sew over the areas with extra thicknesses.
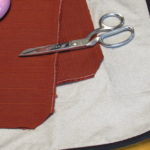
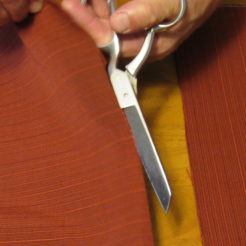
Trim all four corners of each pillow as shown to cut down on fabric bulk when you turn the pillow right side out. Stay about 1/16-inch away from your corner stitching.
Step 5 – The Flange Finish
My iron and ironing board are almost as important to me in sewing as my sewing machine is because I’ve learned the hard way how pressing as I go–pressing IN hems and pressing OPEN seams, for example–improves the accuracy of my sewing and hence the look of the finished item.
So before you turn your pillow to its right side, take time to press open the seams all the way around, as best you can.

Then turn right side out and press those same seams open from the right side, too. Use the points of your scissors (closed) to shape each corner CAREFULLY without poking a hole in the fabric.
A well-pressed-open seam will be easier to fold down, which is what you need to do if you want to create a flange or topstitching of any kind. So fold yours down, pin, and press AGAIN. Depending on the heaviness of your fabric, you may want to dampen and cover with a pressing cloth.
Use a seam guide on your machine to mark out the depth of the flange you want. Or, if your seam guide doesn’t go that deep, simply mark the spot on your machine with a piece of masking tape, line up your fabric along the tape as you stitch, and voila! You’ve got a flange edge!
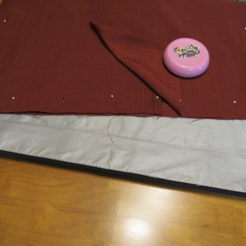
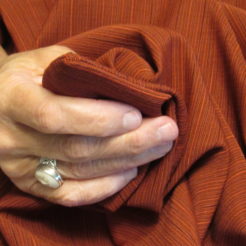
Unfortunately, this is the only photo I have of these finished pillows. I meant to take one of them IN the hammock chair and one with my daughter using them as well. But it was a crazy summer, which explains why it’s halfway to winter and I’m just now sharing this. My daughter was ill (she’s better now, thank you), and whenever I was at her house helping, we either didn’t have time for photos or no one felt like it or both.

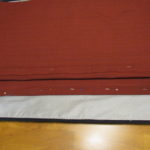
But here’s a closeup of these 1-inch flanges.
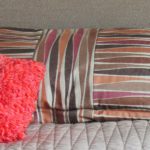
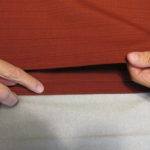
This is a 2-inch flange.

And this is a 2.5-inch flange. I wanted more loose fabric on my bed shams to help cover up bedding and be more decorative. On outdoor pillow covers, larger flanges would be in the way.
You may not want ANY flange, in which case DON’T add the additional fabric to your cuts in step 1, and then skip this last step completely. After you sew the sides, trim the corners and turn right-side-out, you’re done. You can even get away with not ironing those seams open if your pillow insert is extra plump.
If you want more, more is on the way, including…
- CATCH-UPs: A mini-tutorial on extending a throw to cover the end of a king-sized bed, and how to turn an inexpensive throw rug into an embellished wall-hanging.
- CATCH-22s: What to do when you paint your bathroom and hate the color (yes, it happened to us), prepping a bowed wall for a chair rail, and using peel-and-stick tile to correct a builder boo-boo.
- CATCH-AS-CATCH-CANs: A budget-friendly refresh of a powder room and laundry room, creating a one-of-a-kind chair rail using flooring samples, and some of my favorite thrifting finds and collection ideas.
So you see, even though I haven’t been blogging, I have been VERY busy.
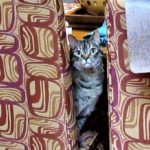
Maisie-Cat & I will catch YOU on the flip side!