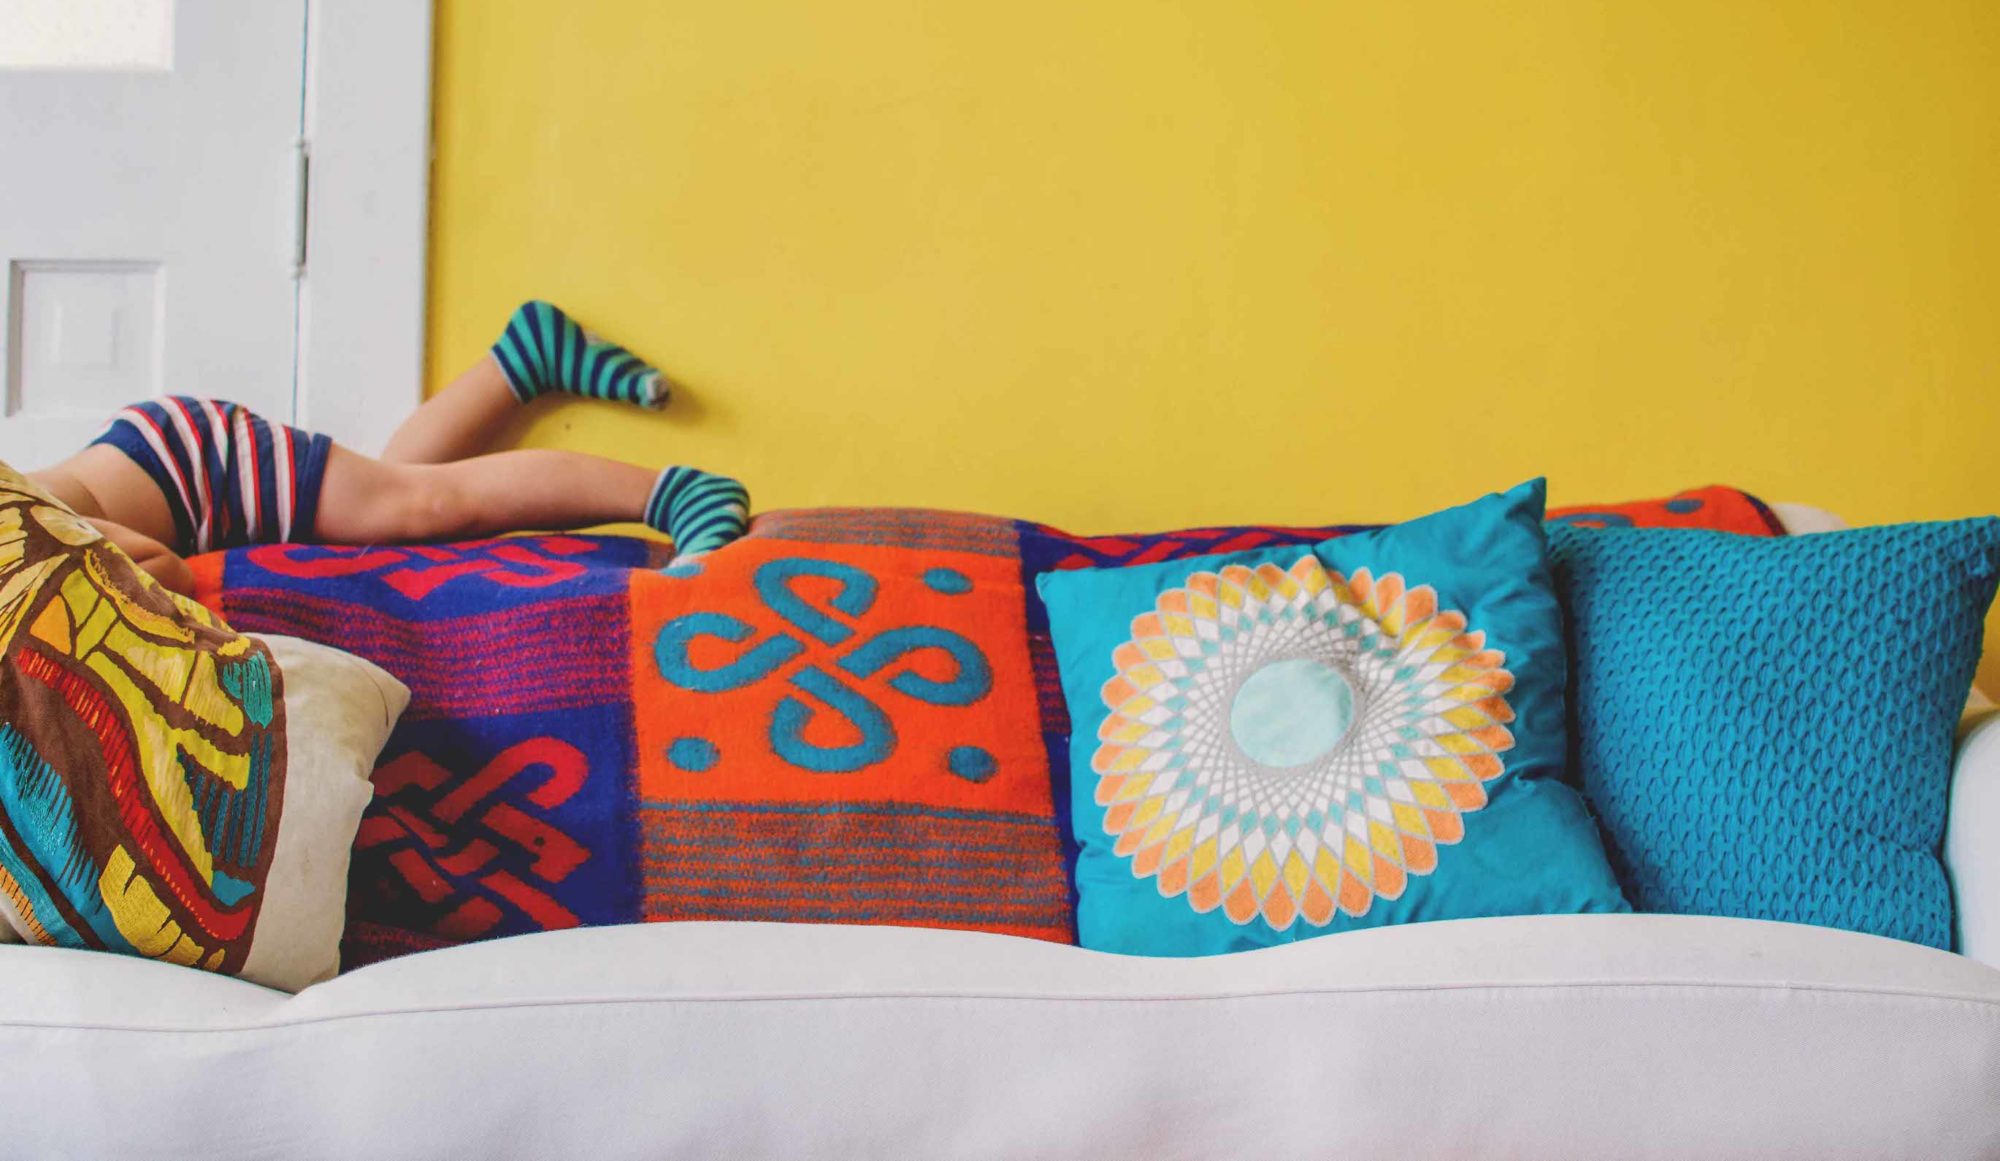
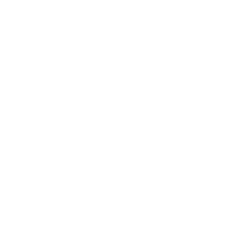
This is the first piece of art I bought for our condo when we downsized and moved here eight years ago. The colors in this print were the inspiration for my kitchen, as was the sentiment. I wanted to feel this way IN my kitchen, and I wanted guests to feel it too.
That’s why I’m adding this new feature, “MY HAPPY KITCHEN,” to BoHo Home–because I want to share with my readers what I do to make my kitchen inviting. Topics will run the gamut from decor to recipes to tips, tricks and how-tos. To kick things off, I want to talk about cloth napkins and how I customized some inexpensive ready-mades to make my kitchen a little happier.

I’ve always loved cloth napkins and have used them everyday since I was in my late 20s. I didn’t get married until I was almost 33 and using cloth napkins “dressed up” all those meals and snacks I ate alone. So much so that I continued using cloth napkins once I had a husband and daughter to share meals with.
If you think cloth napkins are too fussy…
Think again! There are a number of good reasons for using them:
- Cloth holds up better than paper napkins, which seem to be getting flimsier all the time. Now I ask you, who wants a napkin to disintegrate before they have their faces and fingers mess-free? Cloth doesn’t quit.
- Reusable cloth napkins are less wasteful than paper napkins and paper towels. Of course, you’ll probably always need paper towels hear and there. But cloth napkins will help you kill fewer trees and cut down on trash.
- Cloth napkins are more decorative and festive and just plain fun. A table setting just looks more polished with a cloth napkin.
- Cloth napkins are multipurpose. Use them to line a bread basket and keep baked goods warm and fresh, or tie one around a wine bottle to catch the drips. They can also double as placemats.
- Cloth napkins are inexpensive and last a long time compared to paper. I’ve seldom worn out cloth napkins, though I have donated some when I change out decor. If you’re a good shopper you can find bargain ones, and if you sew you can make your own.
- Cloth napkins can usually be used a few times before washing. I generally change mine out daily, whether they look dirty or not. So each one handles three meals a day plus snacks.
- Cloth napkins are easy to clean. If I use more than one per person per day, no biggie. I wash clothes a few times a week anyway and can simply throw in what’s dirty with the other laundry, or wait until I have a full load of napkins and do them all together (because I have a lot of them).
- Cloth napkins are easy to iron, if needed. You used to be able to find permanent press ones. That’s not so easy anymore unless you buy your own fabric and make them. But a napkin is, after all, a simple square and doesn’t take much effort to iron. And if the ironing part is what’s holding you back, maybe the problem is your ironing board and iron and not the process itself, which I find relaxing (in small quantities, of course). Check out my DYI article on the built-in ironing board my husband and I constructed, Be Pressed for Boho Success. Ironing ceased being onerous when we added this feature to my laundry room. If the ironing part REALLY holds you back, try ordering polyester or cotton/poly blend napkins from wedding suppliers. The color choice is endless, and the price is low.
Now, on to the how-to…
I have a tough time finding cloth napkins that carry out my kitchen color scheme. Twice I’ve bought Christmas fabric and made matching napkins and tablecloths when I couldn’t find ones that suited me (my Christmas color theme is the same as my everyday one).
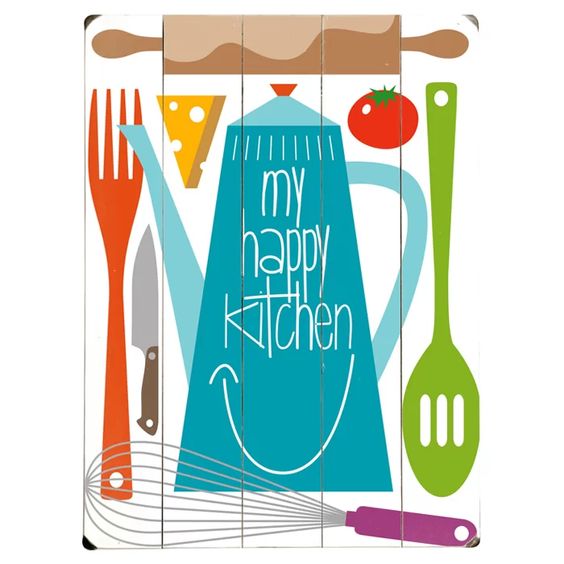
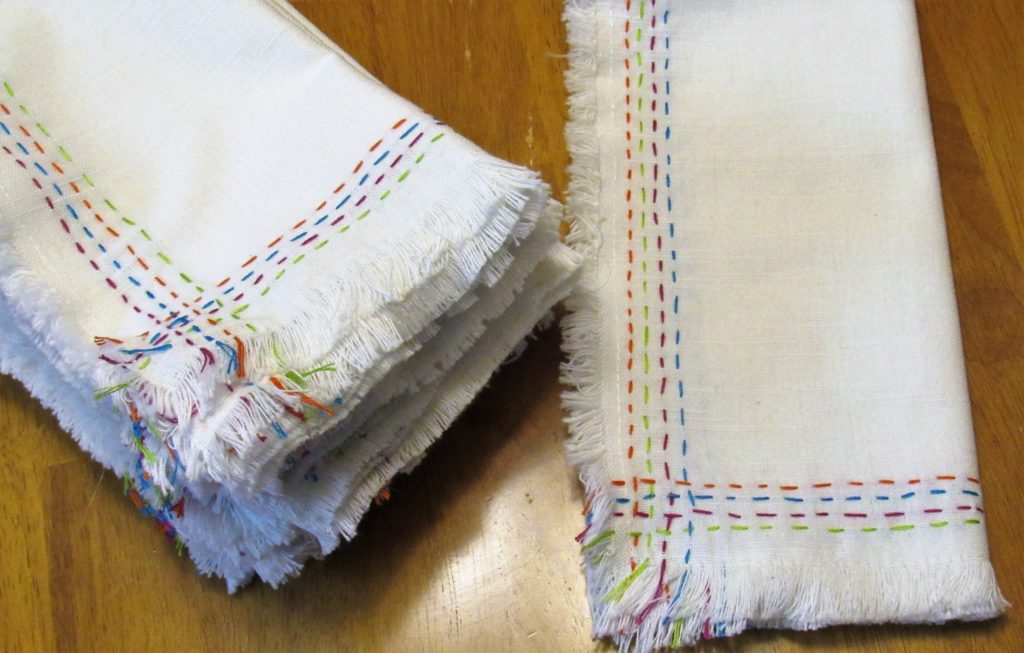
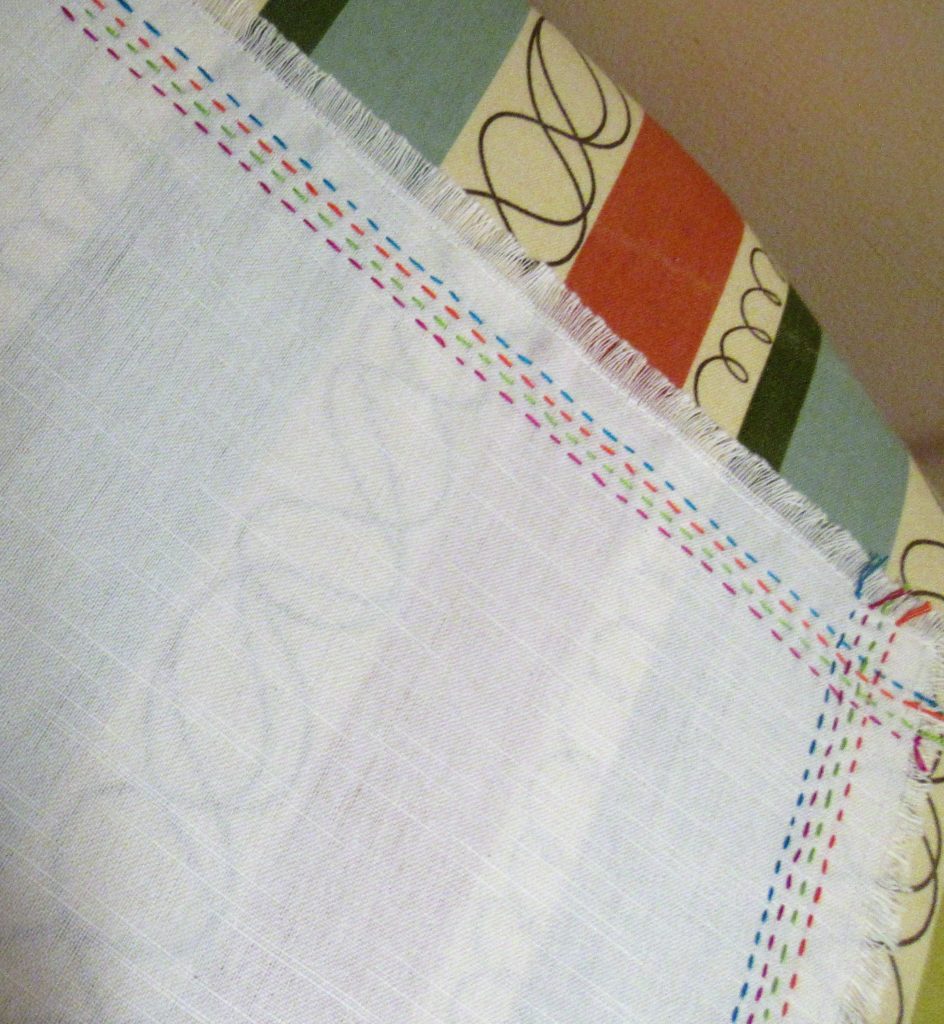
But this time around, I found a lot of 12 plain, off-white napkins with fringed edges (at Home Goods) for $15 and decided to customize them with some simple embroidery. These were a generous 20 by 20 inches, which is exactly what I like.
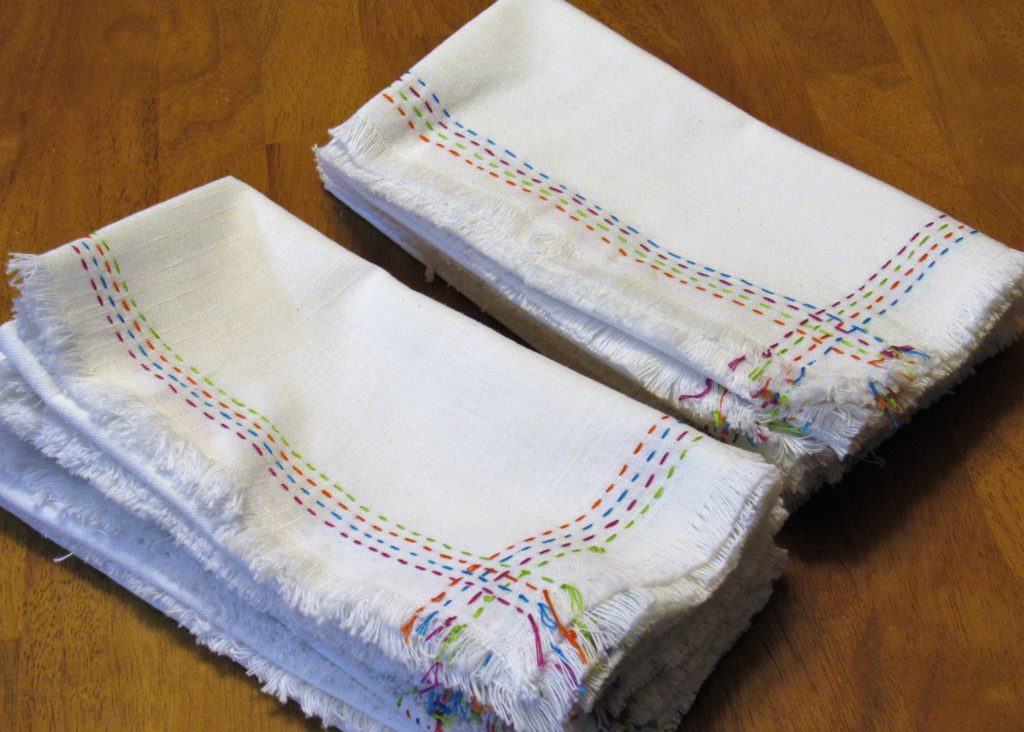
I used a simple running stitch in the four colors found in “My Happy Kitchen” artwork: magenta, turquoise, orange and lime green. I stitched while watching television in the evening, getting about two done per night.

So a week after I started, I had these 12 lovely napkins to grace my table!
I chose a running stitch not only because it’s simple but because it looks the same, front and back, making the napkins completely reversible. I didn’t want a fancy design on one side that looked a mess on the other since the reverse of a napkins is never hidden.
And no, not all my stitches are perfectly even. But that’s part of the charm, I think. Or at least that’s the story I’m sticking with. This is the same stitch used on kantha quilts, of which I have several, and the stitching on them is somewhat inconsistent, too. Like I said, it’s part of the charm.
Getting started…
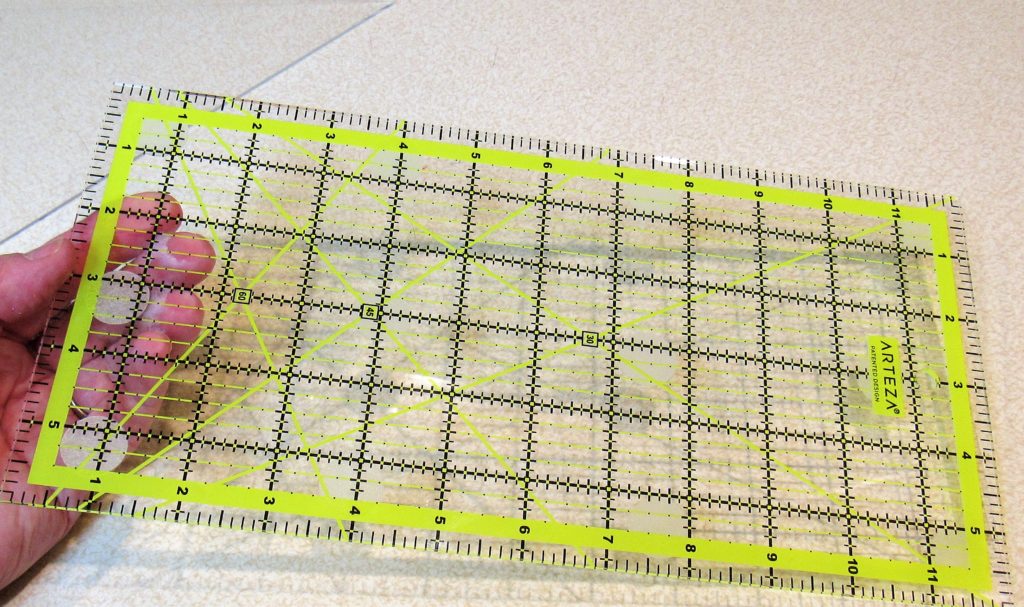
Tools you’ll need include some sort of measuring device and/or straight-edge. I like this Arteza quilting ruler because it’s see-through and makes marking and drawing guidelines much simpler.
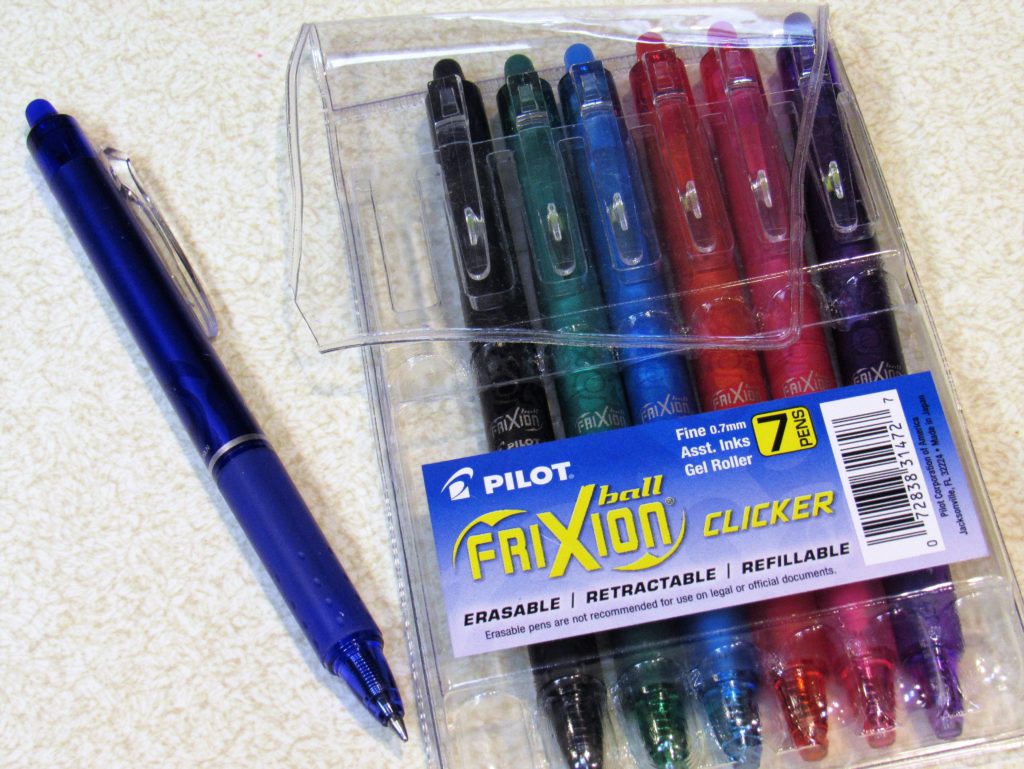
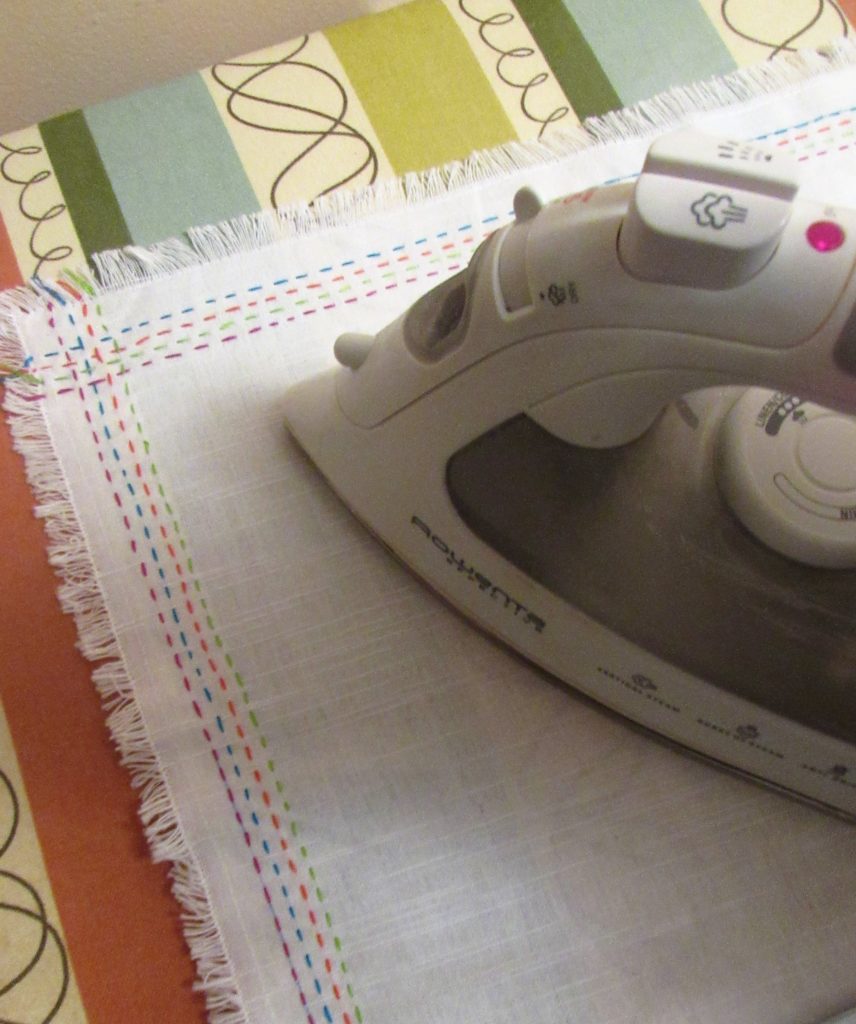
I also used these Frixion erasable pens. The ink is water- and heat-soluble, meaning it disappears as soon as you iron over it. They also last MUCH longer and are less expensive than similar pens marketed as marking pens for sewing. Having a variety of colors means you can pick the one that works best for the fabric you’re marking.
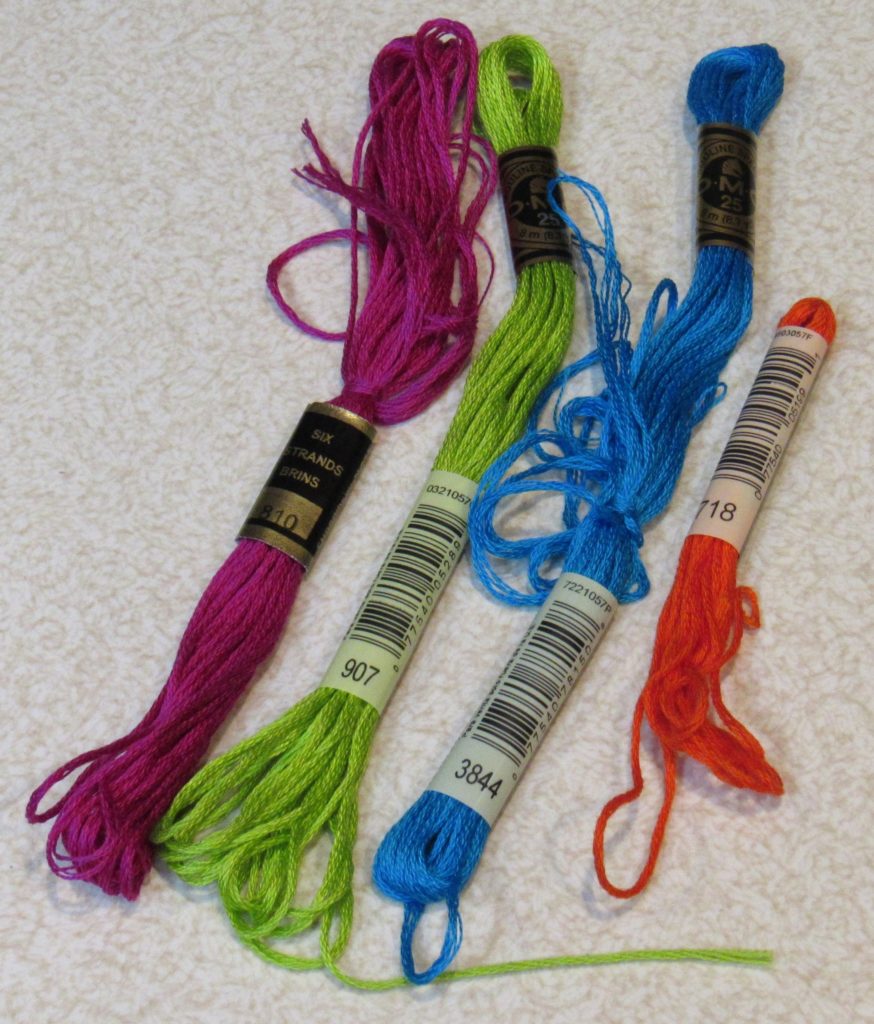
As far as supplies, you’ll need your napkins (sorry, I forgot to take a photo of these before I customized them) and embroidery floss in your chosen colors. My 12 napkins took two to three skeins of each color.
I used the measuring/markings tools to draw a line on all four sides of each napkin a half-inch in from the edge of the fringe.
On to the how-to…
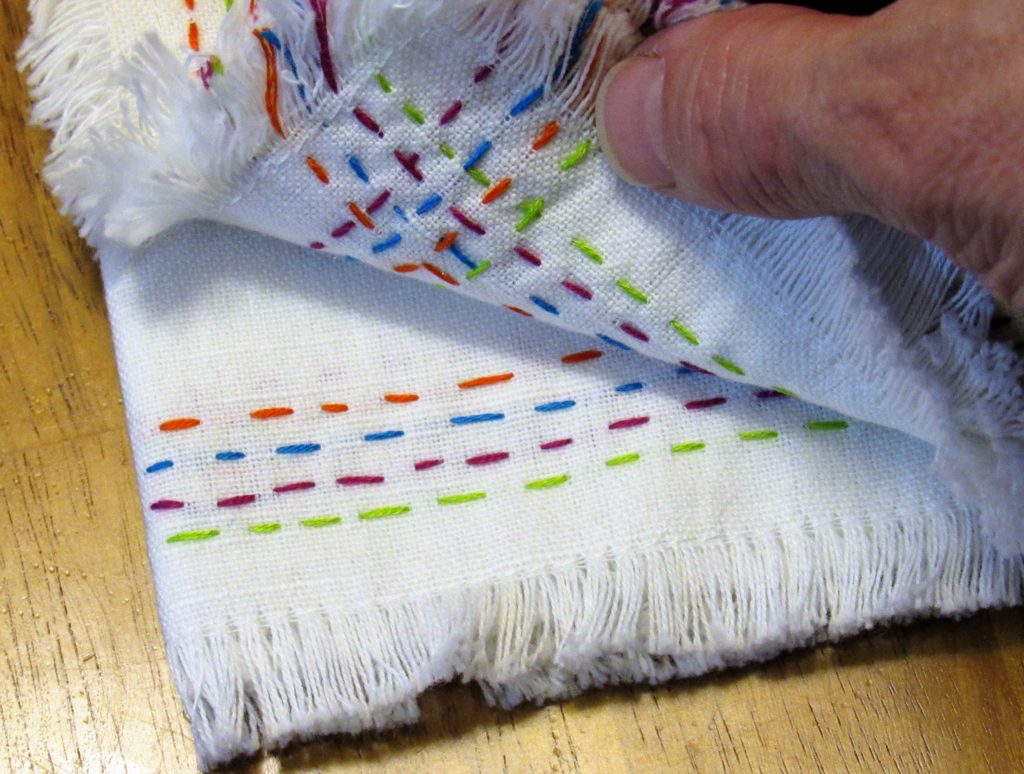
If you’ve embroidered before, you know embroidery floss is made up of six finer strands of thread twisted into one. Typically, you cut off a length and divide it into two lengths of three strands each, depending on how heavy you want the embroidery to look.
Though I have used all six strands before, I used three for this project. I tied a tiny knot in the end of each strand to anchor it at my starting end and did the same at the finish line by looping through an end thread of the napkin. This should keep the embroidery from unraveling when laundered.
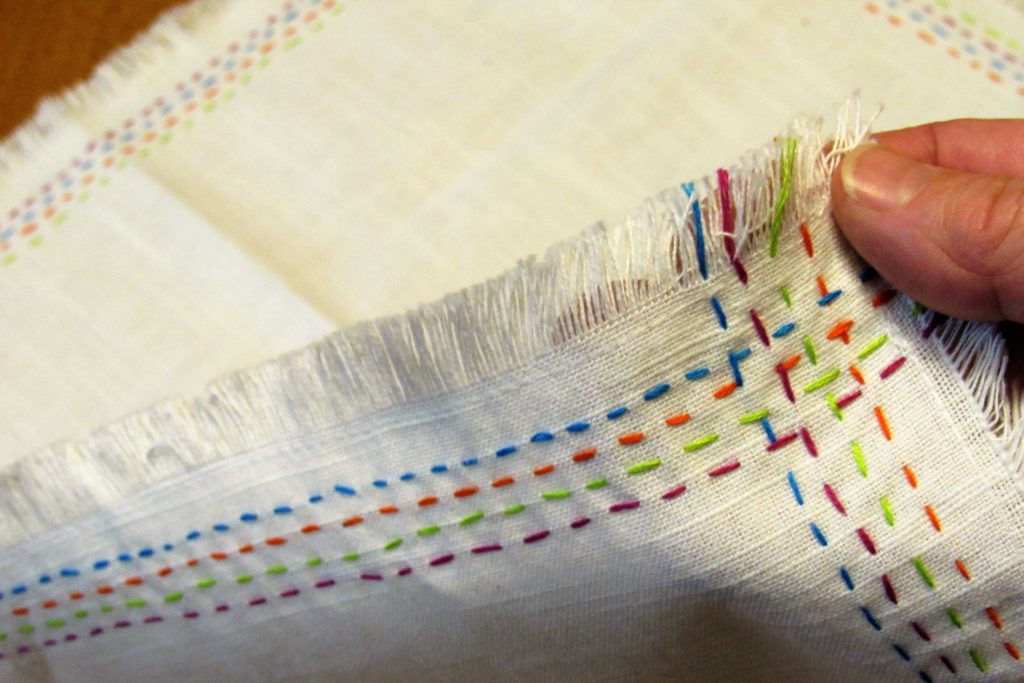
The lines I marked were the starting points for my first line of embroidery. The subsequent three lines I eye-balled, going in about a quarter-inch with each color. Again, the bit of inconsistency adds to the homemade charm.
However, I did make sure to follow the same color order on every napkin, which made each side different. But from napkins to napkin, I always rotated colors in the same order to achieve an consistent and interesting interweaving of colors at the corners.
You can see the guideline I marked in the unpressed napkin along the outside line on the left side, which the magenta line of stitching follows.
…and how it disappeared after ironing–voila!
And now I’m set for my next dinner party…
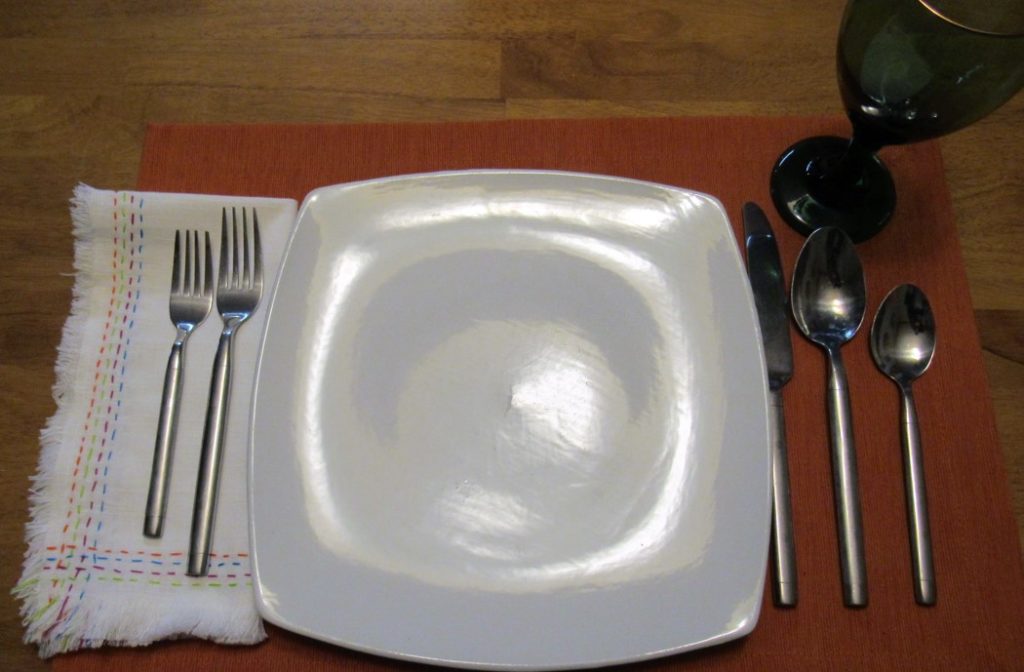
Or the next six nights of dinner for two with my sweetheart, starting today with Valentine’s Day 2020. And whether you spend your V-Day with The One, friends, or that BFF who is your own self, do something to make sure YOU feel loved and extra special, because you are.